The start of something really awesome!
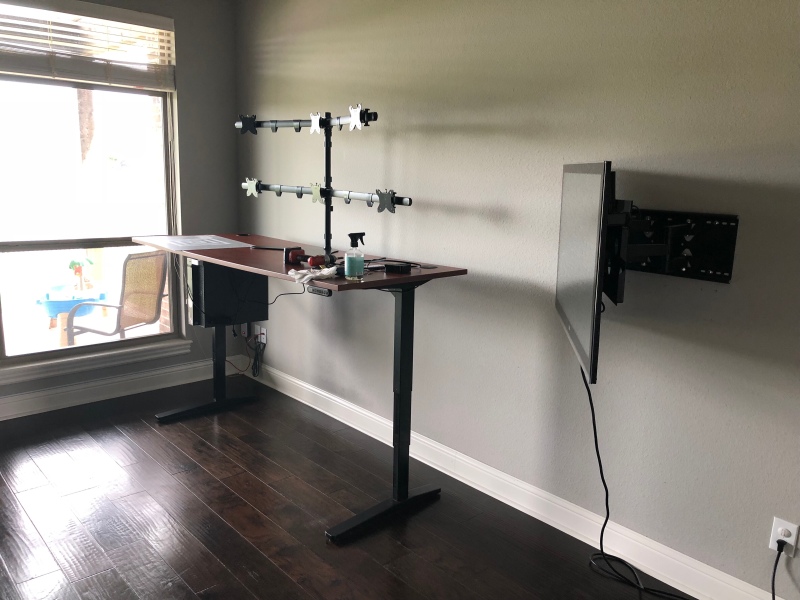
- Ultra wide Uplift Desk
- Hex Monitor Stand from Monoprice

The following is a list of very simple cyber security things you can do to protect your digital life.
Lastly, I want to leave you with the simplest recommendation of all… keep track of all your computers and devices!

This is a short article, more to capture the data than anything.
The following screenshot is the simple setup for adding a firewall rule to pfSense to allow Tanium traffic through.
The settings boil down to allowing all traffic on destination port 17472 to pass through to the specified destination ip address.
Microsoft has become rather aggressive with updating endpoints with their newest Windows 10 operating system. As a result, I’ve had friends and family complain about waking up one morning to a whole bunch of changes to their computers. Since these people are all attached to my lab instance of Tanium… figured I’d setup Tanium to monitor for these… so when I get these calls, I can sound more knowledgeable about their plight.
Monitoring this type of thing involves knowing what information you’d like to watch for… in this case
Get Computer Name and Operating System and Operating System Build Number from all machines
Saving this as a saved question, if monitored, would notify me whenever a major update gets delivered to computers under my management.
To setup monitoring, you’ll need to have Tanium Connect:
That’s it. Now whenever any of my managed endpoints have major updates delivered to them, i will receive an email with the computers name, OS, and build version.
My upcoming new office and home-lab space has inspired me to review some of my past technology choices. The first review comes in the form of video monitoring.
The setup I’m using at my current home involves a NightOwl 16-camera DVR with cheap BNC cameras. I was very pleased with it until I went to extend or even check for software updates… then I hit a serious brick wall! I learned it is basically a cheap DVR that hasn’t been updated in, at least, a decade. Well behind the curve for this tech geek. Time to upgrade!
I began my research where I began… a DVR, but this time I’d have it professionally installed. Well… the cost started to pile up very quickly. At the end of the quote, each of the 7 cameras were going to cost $450 each! That is insane!! Back to the drawing board.
Having a fondness for networking, I started researching IP cameras again. I’ve played with IP Camera software before (Blue Iris) and figured if I ever started over, I’d go that route. My research quickly brought me back to them as a possible option. I also discovered that my Synology NAS had a plugin Surveillance Station. Ultimately I realized that IP Cameras were the direction I wanted to go and this was perfect timing for our new home construction. I switched from the DVR/cameras to purely Cat6 network drops.  Tons of IP Cameras had PoE capabilities so I wasn’t concerned with powering them. On the plus side, IP Cameras may range in price… but even the best options are below $450 per camera.
After research, I ordered a camera I thought had all the interesting features… A Ubiquiti Unifi G3 Dome camera. Picked for the fact that it was an IP Camera, Wide angle lense and PoE. Initial review… I am blown away by this camera, quality and features.
It all starts with their software. It requires either one of their NVR devices to connect, record and manage the camera or a Windows, Ubuntu or Debian computer running their NVR software which is free. I installed it onto my workstation since I’m currently evaluating… and connected to the camera almost instantly.
I installed their iOS app and it was effortless to point it at my workstation where the NVR software was running and start viewing the camera. This software blows NightOwl out of the water and well it should as NightOwl’s app is old as dirt.
I have only scratched the surface of what this camera and software can do… but I will be modifying my network diagram to include a custom built Ubuntu 1U server with DVR hard drives to run the NVR software locally. Plus side, is the Ubuntu server I’m designing can be managed from my Tanium infrastructure and all the benefits that goes with that are included with this setup.
As a treat, here are a few of the images I captured from the iOS software after connecting to the Workstation NVR.
Tanium content published by Moran IT is signed with our organizations private key. By placing our public key within a special directory of your server, you can safely import content Moran IT has signed and published.
We have put together a zip file with our public keys and an installer batch script. If you download the zip file to your Tanium server and execute the batch script, as administrator, your infrastructure will be updated to accept signed content from Moran IT.
This content is published and shared on the Tanium Community website, and adding our keys keeps the security of content delivered from Moran IT safe.
If you would like to setup your own signing keys and process… feel free to ask questions here or contact your TAM and mention this blog.
If you’d like to explore the various solutions I’ve built for Tanium, you can browse them here.
There really is only two ways to configure the Windows Update Agent: Manually through UI or the Windows Update API. Unfortunately as an enterprise admin, you need to use command line utilities to configure endpoints and Microsoft does not provide that. Thus, I’ve put together a really quick command line utility that uses the Windows Update API to allow you to configure using our favorite platform… Tanium.
First thing you must do is download the entire Tanium solution pack for Windows Update. Once you’ve downloaded the Windows_Update.xml, you must import it through your Console->Authoring->Import Content.
You’ll find it contains multiple sensors, packages and saved questions for reading and changing the configuration.
 One of the packages requires external files that are downloaded from files.danielheth.com. These files are served up via https and thus you must configure my Certificate Authority in order for your Tanium Server to properly download from that location. You must also configure a White Listed URL as well. You can read more about doing this at https://danielheth.com/2015/02/02/secure-downloading-of-package-files-with-tanium/
OR you can simply download the three files manually and update the Distribute Windows Update Tools package. We will explore this second option in this article:
Download all following files:
Then edit the Distribute Windows Update Tools package by going to Console->Authoring->Packages, filtering by “Distribute Windows Update Tools” and edit the correct package. Then “Delete” all three files linked to this package…
Now we will “Add Local Files…” for each of the three files we downloaded earlier.
Now that we have all three “local” files uploaded into the package we’re ready to start using this solution…
Included in the solution pack is a new dashboard which groups all the functionality together in a single location. Browse to that dashboard by looking under “Other Dashboards” and finding the one called Windows Update.
As you can see from the screenshot, there are two included saved questions. One lets you know about the installation status of the special utility we’re using and the other uses that utility to return the current status of the Windows Update Agent using the API.
I already have one system deployed with the utility, but my other 9+ systems do not have it. I can drill down to determine what the names of these systems are and distribute to specific machines, but I want my entire infrastructure to have this utility. Thus I will right click on the “No” answer and deploy the package we edited before, the Distribute Windows Update Tools package. Complete the deployment of that action and within 10 or so minutes, you should start seeing the Windows Update Configuration appear in the right answer grid.
The Windows Update Agent has a few modes of operation:
To make changing this mode-of-operation status easy, I’ve included a Configure Windows Update Status package with the above described options. Select the configuration answers that are not configured as you want and launch this package to change it.
If you chose to schedule the automatic installation of updates you can use the Configure Windows Update Schedule package to change the day and time updates will install.
I would like all my systems to download and automatically install updates every day at 1am. To do that, select all the configurations that do not match your desires, Right click and Deploy Action. Select the Configure Windows Update Schedule package from the dropdown and two parameters will appear. One to specify the day of the week and the other the hour. The hour is specified in 24-hour “military” time and is only configurable for on-the-hour.
After 10 minutes, the Windows Update Configuration answer grid will start updating with the newly configured schedule. The Windows Update Config sensor is set with a max age of 10min, thus we must wait that long before the sensors script is executed again and the new configuration starts appearing in the answer grid.
I hope this helps those of you who wish to use the Windows Update Agent to update your systems rather than using a more involved patching solution.
Note that this solution DOES NOT USE the Tanium file/shard downloading functionality… each endpoint will download updates directly from Microsoft.
Also I have only tested this on Windows 7 systems. It is possible the Windows Update API will not function as coded on other versions of Windows. If you wish to view the code for the wu4tanium utility, it is available on github. Feel free to fork that project to add functionality or compatibility with other versions of Windows.
As you are building content, specifically packages, for Tanium, you may find you need to add one or more files related to the package. Often times you want to have TLS to secure those and thus download them via HTTPS. If you’re like me your organization has it’s own certificate authority and you sign your own website certificates. As such you must give Tanium your CA certificate in order to validate the any of your webservers signed with this custom CA. This is extremely easy to do…
Tanium stores the authorized certificate chain within a subdirectory of the Tanium Server… \Program Files\Tanium\Tanium Server\Apache24\conf\installedcacert.crt
Tanium reserves the right to change this file as they see fit… thus we must copy this file to a new location and add the text version of our companies CA into this file and save it to a new location.
For my “company”, Moran IT… Our public certificate looks like this in text form:
Moran Certificate Authority
==========================
—–BEGIN CERTIFICATE—–
MIIGDzCCA/egAwIBAgIJANMncJKfhIjFMA0GCSqGSIb3DQEBBQUAMIGdMQswCQYD
VQQGEwJVUzERMA8GA1UECAwIQXJrYW5zYXMxEzARBgNVBAcMClNwcmluZ2RhbGUx
FDASBgNVBAoMC01vcmFuLCBJbmMuMQswCQYDVQQLDAJJVDEkMCIGA1UEAwwbTW9y
YW4gQ2VydGlmaWNhdGUgQXV0aG9yaXR5MR0wGwYJKoZIhvcNAQkBFg5jYUBtb3Jh
bml0LmNvbTAeFw0xNDA3MTAxOTUxMjhaFw0yNDA3MDcxOTUxMjhaMIGdMQswCQYD
VQQGEwJVUzERMA8GA1UECAwIQXJrYW5zYXMxEzARBgNVBAcMClNwcmluZ2RhbGUx
FDASBgNVBAoMC01vcmFuLCBJbmMuMQswCQYDVQQLDAJJVDEkMCIGA1UEAwwbTW9y
YW4gQ2VydGlmaWNhdGUgQXV0aG9yaXR5MR0wGwYJKoZIhvcNAQkBFg5jYUBtb3Jh
bml0LmNvbTCCAiIwDQYJKoZIhvcNAQEBBQADggIPADCCAgoCggIBAOnkgbJVkJLt
+nwB+sUK0nnpOq0LiILir9utUTXh0XegrKDfUiEBFtJ2JbFEPWmwjhrwZGn/HHSw
S+92VD39pL8a5+iBfI9g7sK+3JxcPYKMUOzgePGSrEwVo8OY3s9lmhfoUxCEVgVF
/WPjKJMmgzRKL8SSy7ZlblylAr48C9tIIBUErk5F8IfceT27TfEoBosKQjexv6Kq
oX5eJUx6ry8AXbqPi0kmPIqQffHGydlyLycDa3SAfOh8PbLAdH3K0IIpQKsxBICo
vUIpnq4hrAqGRXiLNmj0C0jb0Fxa+d+kUZIeGY3aNUHfihVKj2v/Y09+88L8ORiL
AtZn5Tfr0mOhKY4s9nWv8vHGuuzFiMbS1evrmxq8/2cUnA9mIb+ZowQ7fAgHzjaV
UTnLqdb+QZZRzEMemKSj4rf6AjidXzFjg2tdXcx2j5KZLKvFmUCQXsKkS3SG24pL
k1hVauJJNyUvkgp1mho9hK1INAA6JnEwHehY9i147AsmjqepoMDT/zTD2Y3UPnwC
3TNUpyVFlVaG0tKyzgWjKttVbvO5rSzwrzPNBWdFEWnVpuWiNp3FTWFQbA1NqwUq
k7efD9VM1lskfgyRqJ56jcQRaCHV7W0ncceVdlkrcvDn05OzDYfxQurU/+JE5vNc
Iko4V2fcmIITDUNvzadicLgqT2uiuP8xAgMBAAGjUDBOMB0GA1UdDgQWBBTBL5Gs
OMqI/FDxr2mYt0GSpAQpDjAfBgNVHSMEGDAWgBTBL5GsOMqI/FDxr2mYt0GSpAQp
DjAMBgNVHRMEBTADAQH/MA0GCSqGSIb3DQEBBQUAA4ICAQCY8KG201hgc4IXAv/w
4gwkXygUHU6hnWSt1W5BFnLrHBOR5JWA9AKa2vc1SXUhgC03oVcxAZBDj6UKycC0
787Qf2hdjzBSrUw56DEcIrA3A/ciq+YE1/GNpGmcgCEai546zHGBvEFdCcHXsFZu
OjJSZvvggw+1URl8qN8SIz40DA/MGALHBcbNBs1amqlgeSNV5t7zVSfE4v0DNPf+
HE1x+dylvAJuOZAmTeuBNzL9vsTGXw7Mymw4nJqNvDccBJLgPFwhRZcEa1fUqihU
+zMtOSlBs3YO2Wa4qczLorn/SDO1BFLZD+R+W1nUYy9gBi9owWQqdWRv5nB/i1Ps
X3/vB887TbK5/mlLOVLUKupdFE24/g32uElSsX7pLcPpQSiDZd+A6zEgWLaX6j7s
P0PdekimFLrbPfRKXB1v9/hn+z5H4SzUyGlVVWl5Epd32qx5DSPXIwfSrQ1iYYL3
htzx3K6yIdKDWX9Pe/BSSt9Oz78g+i9N66yGY3fE0I54w22Pbwq0dt0UnhKksZJP
SwWzveaqWXejtTUwHf1OYd/IikaKLcNk4cRk5WZvDcd6v29q09wdLYp9URiZ1/bR
pVrfdyeLWNELyLHTgAgbYSUUP3SloFFf9RI5BZgrv+epI+cQRtS0xsXKJnYWVJP0
QcB0/FvjhuWyVWS1u0qRtVLhLg==
—–END CERTIFICATE—–
The first two lines are just a marker… simply copy/paste the above orange text into the installedcacert.crt file and save it as \Program Files\Tanium\Tanium Server\Apache24\conf\mit-installedcacert.crt
If you have any issues getting a text version of your CA certificate… Read up on reformatting a certificate: https://kb.tanium.com/Certificate_Management#Reformatting_a_Signed_Certificate
Now we need to tell Tanium where our newly modified CA chain file is. Browse to HKLM\Software\Wow6432Node\Tanium\Tanium Server And edit the TrustedCertPath variable by adding a “mit-“ to the beginning of the filename.
Now we just need to restart the Tanium Server and Apache services to have our new certificate authority chain load.
The topic I just covered is detailed in the Troubleshooting_Packages kb article over in the Tanium KB, but I find a personal walkthrough can be helpful.
If you are using any packages that download files from files.danielheth.com, you will need to copy the above orange text into your installedcacert.crt file to allow that download to happen properly. Otherwise you will always receive the “SSL cannot be verified…” error.
One last thing as well, you will likely need to add files.danielheth.com to your whitelisted URLs. This can be done within the Console->Administration->Whitelisted URLs then “Add New URL Expression as follows:
In any security environment, the first thing that I am asked for is a way to protect the Tanium client from end-user tampering. This is a very common request when it comes to security related software. An innovative TAM at Tanium has built a solution pack which is documented on the community site called “Client Service Hardening”. This solution pack contains a collection of sensors, packages and saved questions related to locking down the Tanium Client service and the file system on Windows endpoints. I would like to explore that solution below.
Just like any of the solution packs available from Tanium, to receive a copy of the solution xml, you need to contact your Technical Account Manager and they’d be glad to share it with you.
Once you have the ClientServiceHardening.xml, import it by browsing to your Console->Authoring->Import Content.
Overwrite any database duplicates, although you should not see any unless you’ve imported an older version of this solution pack like I have.
 The first thing you’ll notice after importing is a new Dashboard Group. This group wraps a few dashboards together that pertain to hardening the Tanium Client service on your endpoints. Particularly the following three areas:
You should implement all three of these in order to fully lock down the Tanium Client Service. Let’s look at and implement each one sequentially.
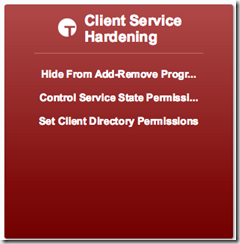
The first thing we will impellent is to hide the Tanium Client from the Windows Add-Remove Control Panel Applet. This is extremely easy to do. Select the Hide From Add-Remove Programs dashboard…
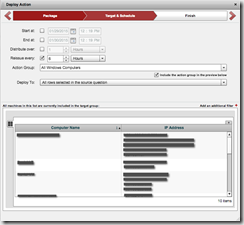
After the questions have completed, right click the “No” answer within the Tanium Client Visible in Add-Remove Programs answer grid. Choose to “Deploy Action” and the Client Service Hardening – Hide Client from Add-Remove Programs should be the default package selected… then step through the action deployment. I’d recommend setting this package to reoccur at least once a day in order to catch systems that might not be online right now. In my infrastructure, I’ve configured the action to reoccur every 6 hours since I have laptops coming on and off throughout the day.  I also know this is a Windows-Only action, thus my Action Group is “All Windows Computers”. Note that the action group was configured ahead of time and only has a single computer group configured with “Operating System contains Win”. This action group gives me assurances that this action will only run my windows systems and not my Linux or Mac systems. This action group could have easily been something else like only “Workstations”, “Laptops”, etc.
Now as this action runs within my environment, the Tanium Client will disappear from the Add-Remove Programs list.
The next thing to configure is the ACLs on the Tanium Client service. This will prevent users and/or administrators from stopping the Tanium Client service. Implementing this is also an easy thing to do… Open the Control Service State Permissions dashboard…
Please note that if an end-user has administrative privileges on an endpoint, it is entirely possible they also have advanced knowledge of ACLs and will be able to reset these permissions in order to stop the service.
All of your windows systems should report back “Service Control is set to default permissions” just like in my environment pictured above. Right click on that answer and “Deploy Action”…The default is Client Service Hardening – Allow Only Local Admins to Control Service, however you could lock the service to allow only the SYSTEM account by selecting the Client Service Hardening – Allow Only Local SYSTEM to Control Service package. I chose to lock it down to SYSTEM since many of my users are configured with local admin privileges and just like before, I will have this scheduled action set to run every 6 hours and only apply to my “All Windows Computers” action group.
Lastly we need to lock down the folder permissions of the Tanium Client. This is the file system level permissions which allow users to browse the “…\Tanium\Tanium Client\” client root directory.
Open the Set Client Directory Permissions dashboard and in the single answer grid, right click on the “Not Restricted” answer to “Deploy Action”.
The default action here is Client Service Hardening – Set SYSTEM only permissions on Tanium Client directory. By default, the Program Files directory is locked down to administrators, thus SYSTEM is the only available configuration package. Just like with the previous two actions, I will configure this to run every 6 hours and only on my windows systems.
The client hardening techniques covered in this article are very close if not exactly the same security measures that Antivirus and other Vendors take to secure their agents on enterprise endpoints.
This solution pack also includes packages for resetting the defaults for each of these security configuration settings… so if you want to un-harden the client, it is certainly possible.
Let me know if you have any questions about this article… If you have questions about the content, I encourage you to reach out to support@tanium.com and one of their extremely helpful Technical Account Managers would be able to assist.
I have more than a dozen Ubuntu servers that perform various jobs. Some of these systems are considered “production” and keeping the installed packages up to date is extremely important. For this article I want to discuss how I am upgrading the installed packages on these systems using the Apt-Get utility and the Tanium platform.
I have built a collection of content that was published on the Tanium Community website. This solution includes multiple sensors, packages and other types of content called Ubuntu Package Management.
Visit https://community.tanium.com/repo/solution/192 and click the “Download” button after logging into the Tanium Community website.
Log into your development infrastructures Tanium Console, then browse to Authoring->Import Content, select the downloaded XML file to complete the import process. It is safe to overwrite any existing sensors as the only one I am using that is not original content is the Operating System sensor.
Now we move onto actually using this content and keeping the packages on your Ubuntu systems updated. On the “Home” tab of your Tanium Console, you’ll find a new dashboard link appear under the “Other Dashboards” block.
A few saved questions will appear… the left pane shows all packages within your environment that have available updates. The right pane will list all of the Ubuntu computers you have within your environment.
There are currently two available packages/actions included with the solution pack. The first is accessible by right clicking on one or more of your Ubuntu systems in the right pane and the default action is Reboot Ubuntu Machine.
The second action is closely tied to the Ubuntu Available Patches sensor as it takes the selected result of that sensor to launch the action. Thus in the left pane, right click on one of the packages and Upgrade Available Ubuntu Package.
There are other handy actions you can take. Right clicking on one of the computers, you can drill down into the Ubuntu Available Patches and a list of packages for that one system will appear…Then you can deploy or upgrade a single package from there. Further right clicking on the computer provides you with the ability to Upgrade All Ubuntu Packages, if that is preferable.
The Tanium Community site does not allow for the sharing of Saved Actions on purpose. Thus these must be setup manually. The first one I’d like to setup is to download the available package updates definitions on a daily basis. Since most of my systems are online 24×7, having this action run at least once a day is perfect. To accomplish this, ask the following Tanium question:
Get Is Ubuntu from all machines
It uses the Is Ubuntu sensor which returns one of two answers for your entire infrastructure… True or False. Right click on the True and deploy the Update Ubuntu Package Definitions package.
I would like this action to occur daily on all of my Ubuntu computers… thus I will be setting up a scheduled action. I have decided to have the action run between 4am and 5am daily so when I start working and want to check my package status, I have the latest data.
Please note that the Action Group is “Ubuntu”. This is because I have setup an action group that only includes my Ubuntu systems that I’ve targeted with my “Ubuntu Computers” computer group.
Using the Tanium platform to manage your enterprise is extremely easy. With a little bit of work and understanding you can put together a solution to accomplish nearly anything you want.